 Seattle Exterior
 Why Rainier Valley Siding Wears Out Faster Than Homeowners Expect
Rainier Valley sits inside one of the wettest, dampest climate zones in the country. Seattle's marine air, the long stretch of driving rain that runs from fall through spring, and the shade-and-moisture combination that fuels a long moss season all put steady pressure on a home's exterior. Siding isn't just cosmetic here — it's the barrier standing between King County's weather and your framing, insulation, and interior finishes. When that barrier is compromised, the damage is usually happening behind the wall long before it shows up on the surface.
Homes throughout Rainier Valley span a wide range of ages and construction styles, from early-1900s bungalows to mid-century houses to newer infill construction. Each has different original siding, different flashing details, and different failure points. What they share is exposure to the same regional weather pattern: months of sustained moisture, wind-driven rain that gets pushed sideways into seams and laps, and organic growth — moss, algae, mildew — that thrives wherever siding stays damp and shaded. Repair work here has to account for all of it, not just patch what's visible.
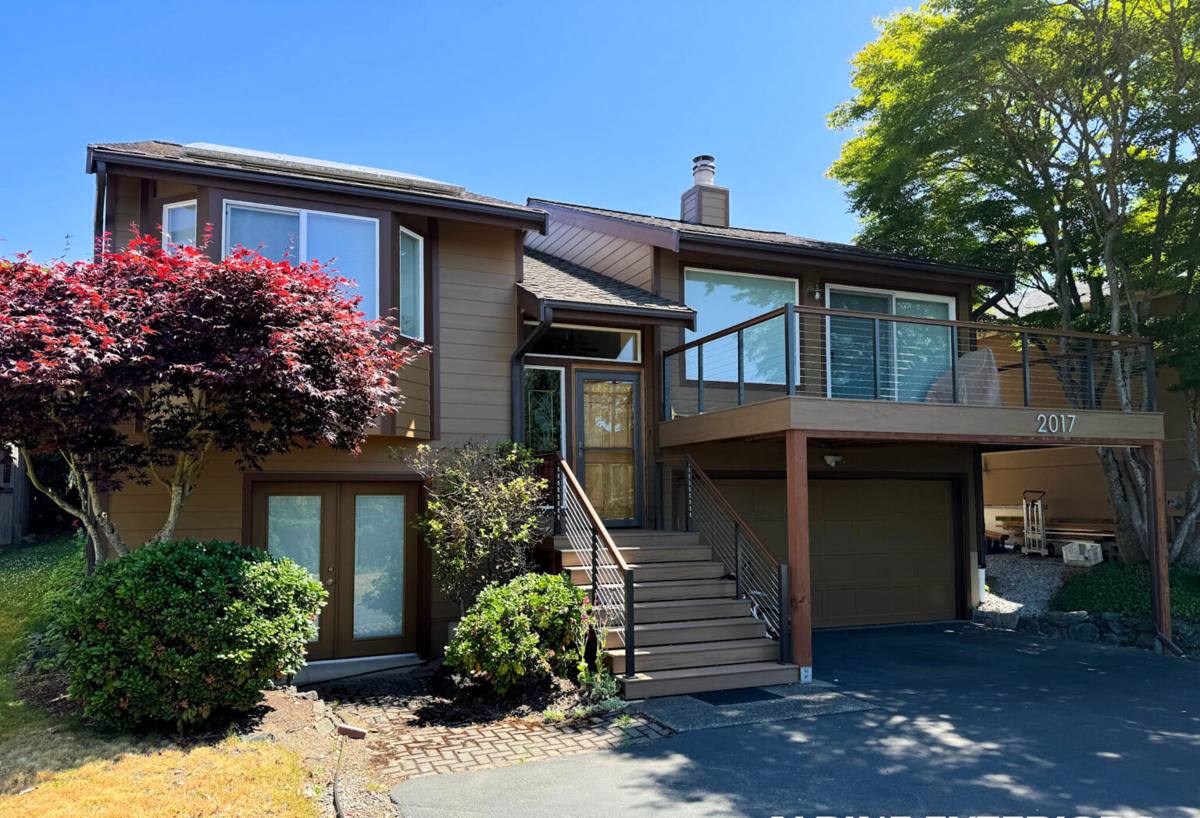
How Seattle's Climate Actually Damages Siding
Driving Rain and Wind-Driven Moisture
Most siding systems are designed to shed water moving straight down. Driving rain doesn't move straight down — Puget Sound storms push moisture sideways, forcing it up under laps, into seams, and behind trim that was never sealed with that kind of pressure in mind. Over years, that pattern finds every weak point in a siding installation: a nail popped too high, a butt joint without proper flashing, a corner where caulk was used instead of correct detailing.
The Long Moss and Algae Season
Rainier Valley's tree canopy and long damp stretches create ideal conditions for moss and algae to take hold on north-facing and shaded walls. Beyond the cosmetic staining, moss holds moisture directly against the siding surface for extended periods. On materials that aren't engineered to handle sustained dampness, that constant contact accelerates swelling, delamination, and rot at a rate dry-climate siding simply doesn't experience.
Marine Air and Material Fatigue
The Puget Sound region's marine air keeps humidity elevated even between rain events, which means siding rarely gets a long, uninterrupted dry stretch to fully release moisture it's absorbed. Combined with our mild but persistent freeze-thaw cycling in winter, this slow, repeated wet-dry stress is what quietly breaks down caulk joints, swells wood-based products, and works fasteners loose over time.
Signs Rainier Valley Homeowners Should Watch For
Siding problems in this climate rarely announce themselves with a dramatic failure. They show up as small, easy-to-dismiss signs that indicate active moisture intrusion underneath. Catching these early is what keeps a repair a repair, instead of letting it become a full re-side.
- Soft or spongy spots when you press on the siding, especially near the bottom courses or around windows
- Visible bubbling, bowing, or waviness in the siding panels
- Paint that's peeling, blistering, or failing in one specific area rather than uniformly across the wall
- Dark streaking, persistent moss growth, or discoloration concentrated in one section
- Gaps, cracks, or separation at seams, corners, and around window and door trim
- A musty smell or visible staining on interior walls that share an exterior wall with the affected siding
- Wood trim or fascia that's rotting near where it meets the siding
Any one of these can be isolated and minor. Several together, or any sign paired with softness you can feel by hand, usually means moisture has already reached the sheathing and the repair needs to start with an honest look at what's happening behind the surface.
What a Correct Siding Repair Actually Involves
A repair that only replaces the damaged board and moves on is a repair that's likely to fail again. Because Rainier Valley's climate drives moisture behind siding as often as it damages the surface, a repair done right has to answer one question first: how did water get in, and is it still getting in?
Diagnosis Before Demolition
We start by identifying the actual source — a failed flashing detail, a caulk joint that's given out, a nail driven through the wrong spot, or a grading and drainage issue pushing water up against the wall from below. Pulling and replacing siding without fixing the cause just resets the clock on the same failure.
Checking What's Underneath
Once the damaged siding is removed, we inspect the water-resistive barrier and sheathing underneath. If moisture has reached the wall structure, that has to be addressed — dried out, repaired, or in more serious cases, replaced — before any new siding goes back on. Covering up compromised sheathing with new siding is the single most common way a repair turns into a much larger problem two or three years down the road.
Correct Flashing and Detailing
Every seam, corner, window, and door opening needs to be properly flashed and lapped so water sheds outward and down, not into the wall cavity. This is where a lot of original installations — and a lot of quick patch jobs — cut corners. It's also the detail that determines whether a repair actually holds up through the next several wet seasons.
Matching Materials the Right Way
Where existing siding is being patched rather than fully replaced, we match profile, reveal, and finish as closely as the original product allows. Where the existing material is a poor performer for this climate, we talk through whether a full section replacement in James Hardie fiber cement makes more sense than repeatedly patching a product that's going to keep failing in the same way.
Common Repair Scenarios We See in Rainier Valley Neighborhoods
| Scenario | Typical Cause | What the Fix Requires |
|---|---|---|
| Rot at the bottom courses | Splash-back from grade, missing or failed kick-out flashing | Address drainage/grading, replace damaged material, correct flashing |
| Damage around window and door trim | Failed caulk or sealant, missing head flashing | Re-flash openings correctly, replace affected trim and siding |
| Swelling or delamination on shaded walls | Persistent moss/algae holding moisture against the surface | Remove growth, evaluate substrate, replace compromised sections |
| Cracking or splitting at seams | Original material fatigue, improper fastening, thermal movement | Replace affected boards, correct fastening pattern and seam detailing |
| Interior staining on shared walls | Long-term moisture intrusion reaching sheathing | Open wall assembly, dry and repair sheathing, rebuild exterior properly |
Why We Repair — and Rebuild — With James Hardie Fiber Cement
When a repair calls for new material rather than a like-for-like patch, we use James Hardie fiber cement, and only James Hardie. We don't install LP SmartSide, vinyl, Cemplank, Allura, primed spruce, or cedar, and it's worth explaining why that matters specifically for repair work in a climate like this one.
Fiber cement doesn't absorb and hold water the way wood-based and engineered-wood products can. It doesn't rot, and it isn't a food source for the moss and mildew that thrive in Rainier Valley's shaded, damp conditions. James Hardie's HZ5 product line is engineered specifically for climate zones like ours — cold, wet, and humid for long stretches of the year — with a moisture-resistant core designed to hold up under exactly the conditions that break down softer siding materials over time. The factory-applied ColorPlus finish also means a repaired section can be color-matched and finished to a standard that field-applied paint on other materials struggles to match, and it's backed by a stronger, longer warranty than most alternative products offer.
That's the practical reason a repair sometimes turns into a conversation about replacing a full wall section or elevation in Hardie rather than patching the original material again: if the existing siding is a product that struggles with our climate, a repeat repair on the same material is often just delaying the same failure. We'll always give you the honest, lower-cost option when a targeted repair will genuinely hold — we're not looking to upsell every job into a re-side. But we won't quietly patch a product we wouldn't install in the first place and call it a long-term fix.
Our Siding Repair Process
- Inspection and diagnosis — We assess the visible damage and investigate the underlying cause, including checking for moisture intrusion at the sheathing.
- Honest scope and options — You get a clear explanation of what's actually needed: a targeted patch, a section replacement, or in some cases a recommendation to plan for a larger project.
- Sourcing and matching — We source materials to match existing siding where a patch is appropriate, or plan a clean transition where James Hardie material is being introduced.
- Proper tear-out — Damaged siding and trim are removed carefully to expose and evaluate the water-resistive barrier and sheathing underneath.
- Correcting the cause — Flashing, sealant, drainage, or fastening issues that caused the original failure are corrected, not just covered over.
- Installation to spec — New material goes in following manufacturer installation requirements, including proper fastening, lapping, and gapping for our climate.
- Final check and cleanup — We walk the finished work with you and leave the site clean.
Repair vs. Replacement: Weighing the Real Cost Factors
Not every siding problem in Rainier Valley calls for a full re-side, and not every problem should be treated as a quick patch. The right call depends on a few honest factors.
| Factor | Favors Repair | Favors Replacement |
|---|---|---|
| Extent of damage | Isolated to one area or a few boards | Spread across multiple walls or elevations |
| Sheathing condition | Dry, sound structure underneath | Widespread rot or moisture damage found at tear-out |
| Age and material of existing siding | Newer, still-performing material with a localized failure | Original material is at or past its useful life |
| Underlying material type | Fiber cement or another durable, climate-appropriate product | Wood-based or vinyl product showing systemic wear |
| Long-term plan for the home | Staying put short-term, budget-conscious | Long-term ownership, want to stop recurring repair costs |
We'll walk through where your home lands on these factors before recommending anything, and we'll tell you plainly if a repair is the smarter move for your budget and timeline.
Why It Matters to Hire a Crew That Already Works in Rainier Valley
Siding repair done wrong in a climate this wet doesn't just fail to fix the problem — it can trap moisture behind new material and make things worse. A crew that regularly works Rainier Valley and the surrounding Seattle neighborhoods already understands the housing stock's common construction patterns, the way local drainage and grading tends to interact with older foundations, and the specific ways King County's rain and moss season attack siding differently than a drier climate would. That local pattern recognition means fewer surprises once a wall is opened up, and a diagnosis that's grounded in what actually causes failures here — not generic assumptions imported from a different region's weather.
It also means accountability. A local crew is answering to neighbors and repeat homeowners across the same streets, not moving on to another city after one job. That's part of why we standardized on installing James Hardie fiber cement across every repair and replacement we do: it's the product we're confident will still be performing correctly in this climate years from now, under our name.
If you're seeing soft spots, staining, moss buildup, or damage on your Rainier Valley home's siding, we're happy to take a look and give you a straight answer about what it needs. Request a free, no-pressure estimate using the form below, and we'll walk you through exactly what we find and what it would take to fix it right.